
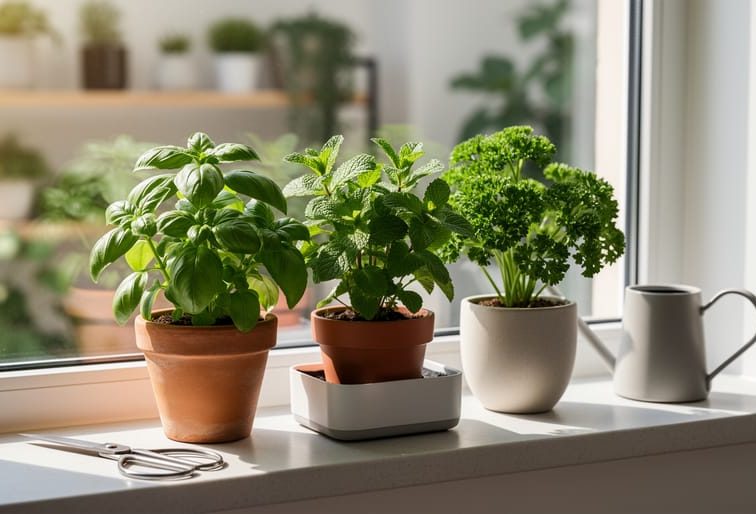

Growing herbs at home takes about 15 minutes to set up and works beautifully even if you’ve never grown anything before. You’ll start with a simple indoor kit or a sunny windowsill, plant easy-going varieties like basil and mint, and enjoy fresh harvests within weeks. The secret is choosing beginner-friendly herbs that forgive mistakes and thrive in typical Canadian home conditions.
Thousands of Canadians discovered herb gardening during the past few years, transforming kitchens and balconies into productive green spaces. What started as a way to save money on groceries became something more: a daily ritual of checking new growth, snipping leaves for dinner, and feeling genuinely connected to food. The best part? Herbs are among the most forgiving plants you can grow. They bounce back from underwatering, tolerate inconsistent light better than vegetables, and keep producing even when you forget to fertilize.
This guide walks you through everything from selecting your first kit to troubleshooting common problems, all with a focus on sustainable practices that build healthy soil and reduce waste. You’ll find stories from community gardeners across Canada who started exactly where you are now, plus practical advice that cuts through the confusion of conflicting online tips. Whether you’re setting up a small indoor garden in January or preparing outdoor containers for summer, the same core principles apply.
Why Herb Gardening Is Perfect for Beginners
Herbs offer new gardeners the perfect starting point because they’re remarkably forgiving and deliver visible results fast. Unlike vegetables that demand months of patience, most herbs sprout within a week and are ready to harvest in just a few weeks. They thrive in small spaces, a sunny windowsill works beautifully, and many herbs actually prefer being slightly neglected rather than fussed over.
You can grow herbs indoors year-round in Canada, turning winter months into productive growing time. This means fresh basil for pasta in January and fragrant mint for tea in February, regardless of the snow outside. Unlike outdoor gardening that follows strict seasonal schedules, herbs give you flexibility to start whenever inspiration strikes.
The culinary payoff arrives almost immediately. Fresh herbs transform everyday cooking, and there’s real satisfaction in seasoning dinner with basil you grew yourself. Many Canadian gardeners discover that herbs become a gateway into broader gardening interests and community connections.
Take Sarah from Vancouver, who started with three basil plants on her apartment windowsill in 2025. She’d never grown anything before but loved cooking Italian food. Within a month, she was harvesting leaves for homemade pesto. That small success led her to join a local community garden, where she now mentors other beginners and grows dozens of herb varieties. Her advice? “Start simple, enjoy the process, and don’t overthink it.”
What You’ll Need: Tools and Materials for Herb Gardening
Getting started with herb gardening doesn’t require a big investment or a trip to multiple stores. You can grow fresh herbs with just a few basic supplies, many of which come bundled in convenient starter kits designed specifically for beginners.
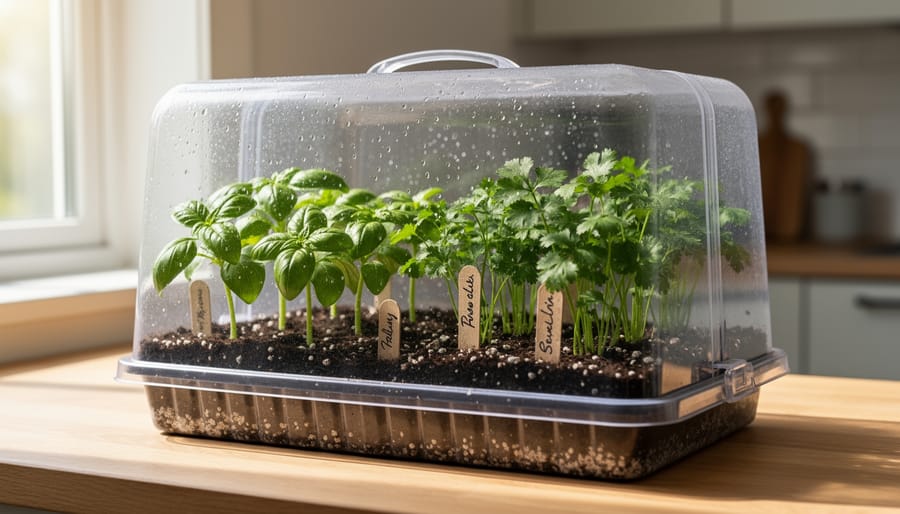
The simplest way to begin is with a complete starter kit like the Culinary Herb Kit – Basic, priced at $19.17. These kits bundle everything you need in one package, taking the guesswork out of shopping and ensuring you have compatible components. Most kits include soil pucks that expand when you add water, growing trays to hold your plants, a clear humidity dome to create the moist environment seeds need for germination, and seed label sticks so you can track what you’ve planted where.
Here’s what you’ll need for your first herb garden:
- Growing containers or trays with drainage holes
- Seed starting soil or expandable soil pucks for indoor growing
- Clear humidity dome or plastic wrap to maintain moisture during germination
- Seed label sticks or markers to identify your herbs
- Small watering can with a gentle spray or misting bottle
- Herb seeds suited to your climate and growing space
If you prefer to assemble your own setup, you can choose garden pots individually and select components that match your available space. Look for containers at least 10-15 centimeters deep for most herbs, and prioritize sustainable options like biodegradable peat pots or recycled plastic trays.
Canadian gardeners can find these supplies at local garden centers, hardware stores, or online retailers. Many communities also have garden exchanges where experienced gardeners share extra pots, trays, and tools with beginners. Starting small with a basic kit lets you learn the fundamentals without overwhelming your space or budget, and you can always expand once you’ve gained confidence.
Choosing the Right Herbs for Your First Garden
Starting with the right herbs makes all the difference. Basil tops nearly every beginner’s list, it germinates quickly, forgives minor watering mistakes, and you’ll use it constantly in pasta, salads, and pesto. Plant it in a sunny spot; basil craves warmth and at least six hours of direct light daily.
Parsley grows slower but steadier. It tolerates partial shade better than basil, making it ideal if your brightest window faces east or west rather than south. Flat-leaf varieties deliver more flavor for cooking, while curly types work well as garnish and in container plant combos where texture matters.
Cilantro prefers cool conditions, perfect for Canadian windowsills in spring and fall. It bolts (flowers and goes bitter) quickly in heat, so plan to reseed every few weeks if you love fresh salsa and curries. Chives are nearly indestructible. They tolerate low light, forgive neglect, and their mild onion flavor brightens everything from scrambled eggs to baked potatoes.
Mint grows so enthusiastically you’ll want it in its own container. It spreads through underground runners and will overtake shared pots. The light requirements for most herbs range from full sun to bright indirect light, but mint thrives even on north-facing sills.
Match herbs to your cooking style. If you make Italian dishes weekly, prioritize basil and parsley. Love Asian cuisine? Start with cilantro and Thai basil. Your first garden should grow what you’ll actually eat, not what looks impressive.
Step-by-Step: How to Start Your Herb Garden
Setting Up Your Starter Kit
Start by soaking your soil pucks in warm water. Place each puck in the provided tray and add about 1/4 cup of water per puck. They’ll expand within 5-10 minutes into loose, ready-to-use growing medium. Gently fluff the expanded soil with your fingers to break up any clumps and ensure even moisture distribution.
Arrange your trays on a stable surface near your chosen growing location. If you’re using the Culinary Herb Kit – Basic ($19.17), you’ll have everything organized in one package, which makes setup straightforward for herb gardening beginners. Position trays where you can easily access them for daily watering without disturbing the seeds once planted.
Clear your growing space of clutter and check that it’s level. A wobbly shelf or uneven windowsill can tip trays and damage seedlings. If you’re growing on a windowsill, place a waterproof tray underneath to protect surfaces from moisture. For multiple trays, leave at least 2 inches between them for air circulation and easy handling.
Consider light access now, before you plant. South-facing windows work best in Canada, but any bright spot will do for most culinary herbs. Your setup should feel accessible and inviting, somewhere you’ll check daily as your herbs grow.
Planting Your Seeds
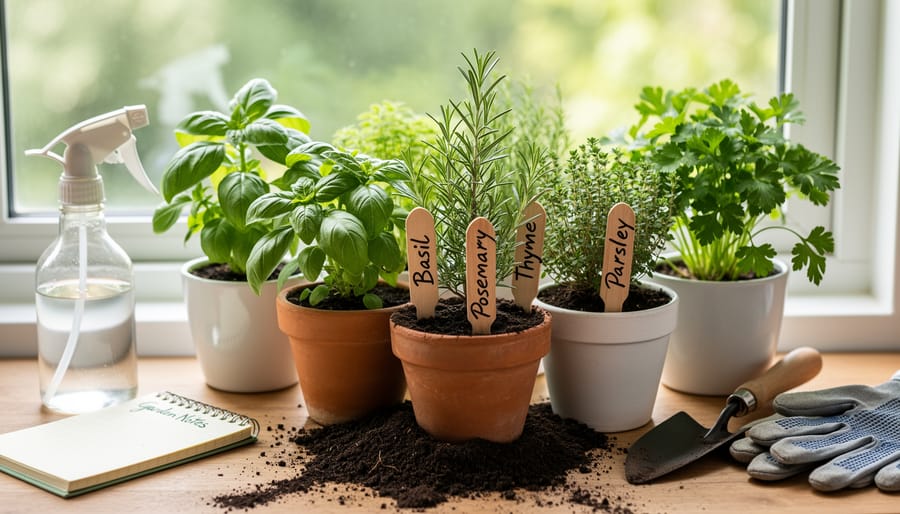
Once your soil pucks have expanded and your trays are arranged, you’re ready to plant. Start by reading the seed packet for each herb, most common beginner herbs like basil and parsley should be planted about 1/4 inch deep, while tiny seeds like oregano need only a light pressing onto the soil surface. Use your finger or a pencil to create small indentations in the moistened soil pucks.
Drop 2-3 seeds into each indentation (this gives you insurance in case some don’t germinate), then gently cover them with a pinch of soil. Pat the surface lightly so the seeds make good contact with the moisture. Immediately label each cell or container using your seed label sticks, trust me, you won’t remember which herb is which once they sprout.
After planting, mist the soil surface with a spray bottle if it looks dry. Place the humidity dome over your tray to trap moisture and warmth, creating a mini greenhouse effect that speeds germination. Most herbs will sprout within 5-14 days under these conditions. Keep the dome on until you see green shoots pushing through the soil, checking daily to ensure the surface stays damp but not waterlogged.
Creating the Right Growing Environment
Your herbs need three things to thrive indoors: the right light, steady warmth, and balanced humidity.
Light is everything. Place your starter kit on a south-facing windowsill where herbs get 6-8 hours of direct sunlight daily. If your windows face north or east, or you’re growing through a Canadian winter with short days, consider adding a simple LED grow light positioned 4-6 inches above your seedlings. Run it for 12-14 hours daily to mimic natural growing conditions. The light doesn’t need to be expensive, a basic full-spectrum bulb works perfectly for herb gardening for beginners.
Temperature matters less than you’d think. Most culinary herbs thrive in the same conditions you find comfortable: 65-75°F (18-24°C). Keep your herbs away from cold drafts near doors or windows, and don’t place them directly above heating vents where hot air causes soil to dry out too quickly.
Humidity keeps seedlings happy. Your dome stays on until sprouts appear, usually 5-10 days. After removing it, indoor air, especially during winter heating season, can feel desert-dry to young herbs. If leaf tips turn brown, set your tray on a pebble-filled saucer with water below the pot bottoms. The evaporating water creates a gentle microclimate without overwatering your plants.
Watering and Early Care
Your seedlings need consistent moisture during their first few weeks, but overwatering kills more herbs than underwatering does. Check the soil daily by touching it with your finger, water when the top half-inch feels dry, not on a fixed schedule. Use room-temperature water and aim for the soil rather than the leaves to prevent fungal issues. A spray bottle works well for the first week, then switch to a small watering can as seedlings strengthen.
Remove the humidity dome once you see green shoots emerging, usually within 5-10 days depending on the herb variety. Take it off gradually: crack it open for a few hours daily before removing it completely. This prevents shock from sudden humidity changes. If seedlings look pale or stretched toward the light, move them closer to your window or consider smart irrigation tools that maintain consistent moisture without guesswork.
Watch for drooping leaves (a sign you’ve overwatered) or crispy edges (underwatering). Adjust your routine based on what your herbs tell you, they’re remarkably forgiving once you learn their rhythm.
Safety and Best Practices
Growing herbs safely means thinking about what touches your plants and what you’ll eventually eat. Always use food-safe containers, avoid painted pots or recycled containers that once held chemicals. Skip chemical pesticides and synthetic fertilizers entirely since you’re growing food; if pests appear indoors, a gentle spray of diluted dish soap and water usually handles aphids or fungus gnats without compromising your harvest.
If you have pets, research herb toxicity before planting. While basil and parsley are safe, certain varieties can cause mild stomach upset in cats and dogs. Keep potentially problematic herbs like chives out of reach, or stick to pet-friendly options if your curious companions investigate windowsills.
Proper ventilation prevents mould and keeps air circulating around your plants, especially under humidity domes during germination. A small fan on low speed works well once seedlings emerge. Sustainable practices matter too, reuse containers when possible, compost spent soil and plant material, and save seeds from mature herbs to share with fellow gardeners. These small choices align your indoor garden with the broader values of community gardening: growing responsibly, reducing waste, and building skills you can pass along to others starting their herb gardening journey.
How to Know Your Herbs Are Thriving: Verification and Troubleshooting
Your herbs will tell you whether they’re happy, you just need to know what to look at. Within five to fourteen days of planting, you should see tiny green shoots pushing through the soil. That’s successful germination. Healthy seedlings have bright green leaves that stand upright, sturdy stems, and consistent growth across your tray. If you planted basil, parsley, or cilantro at the same time and one herb lags behind, don’t worry; different herbs germinate at different rates.
Watch for these signs your herbs are thriving: new leaves appearing every few days, stems thickening as they grow, and leaves that feel firm when you gently touch them. Most herbs are ready for their first harvest when they reach four to six inches tall and have at least three sets of true leaves (the ones that appear after the initial seed leaves).
Now for common problems. Leggy seedlings with long, thin stems that lean or flop over signal insufficient light. Move your tray closer to the window or add a grow light. Yellowing leaves usually mean overwatering or poor drainage, let the soil dry slightly between waterings. Slow growth often comes from cold temperatures; herbs prefer warmth between 18°C and 24°C.
Learning to read your plants takes practice, but every Canadian herb gardener started exactly where you are. Keep notes on what you observe each week. You’ll quickly recognize the difference between a thriving plant and one asking for help, building confidence with each harvest.
Common Questions About Herb Gardening for Beginners
How long until I can harvest my herbs?
Most beginner-friendly herbs like basil and cilantro are ready for light harvesting in 3-4 weeks, with fuller harvests starting around 6-8 weeks. Chives grow more slowly but provide consistent cuts once established, typically within 8-10 weeks from seed.
Can I start herb gardening for beginners without buying a kit?
Absolutely. You can use any containers with drainage holes, regular potting soil, and seeds from a garden centre. Kits simply bundle everything together for convenience, but individual supplies work just as well and let you customize your setup.
What if I don’t have a sunny window for growing herbs indoors?
A simple LED grow light solves this problem and costs less than you’d think. Position it 6-8 inches above your herbs and run it for 12-14 hours daily to mimic natural sunlight, making year-round indoor growing possible in any room.
How do I keep my herbs producing after the first harvest?
Harvest regularly by pinching off the top sets of leaves, which encourages bushier growth and prevents flowering. Feed your herbs with diluted liquid fertilizer every 3-4 weeks once they’re established, and consider our overwintering tips to extend the growing season for perennial varieties like chives.
Beyond these common concerns, many new gardeners wonder about container sizing. Start with pots at least 4-6 inches deep for most culinary herbs, though mint and basil appreciate 8-inch containers once they mature. You can begin several seedlings in smaller cells, then transplant as they grow, which stretches your initial investment further and lets you experiment with different varieties before committing space.
Connecting with the Canadian Herb Gardening Community
Starting your herb gardening journey doesn’t mean going it alone. The Gardening Life Community Project connects Canadian herb gardeners through local meetups, online forums, and social media groups where beginners share photos, swap troubleshooting tips, and celebrate first harvests together. Many cities have community garden plots where you can grow herbs alongside experienced gardeners who are happy to mentor newcomers.
Look for workshops specifically designed for herb gardening beginners at local garden centers, libraries, and community centers. These hands-on sessions often cover everything from seed starting to winter growing techniques. Volunteer programs at community gardens offer another way to learn while contributing to food security initiatives and sustainable gardening practices in your neighborhood.
Share your herb garden progress online using local gardening hashtags or regional Facebook groups. Post photos of your windowsill setup, ask questions when you hit a snag, and document your learning curve. Other Canadian herb gardeners face the same climate challenges and indoor growing conditions you do, and the collective wisdom of the community makes everyone more successful. Your beginner questions today become helpful answers for someone else tomorrow, building a supportive network that makes herb gardening more rewarding for everyone.
You’ve learned everything you need to start herb gardening as a beginner, and now it’s time to take that first step. Remember, every experienced gardener started exactly where you are today, with curiosity, a small space, and the desire to grow something fresh and meaningful. Whether you begin with a $19.17 starter kit on your kitchen windowsill or dedicate a corner of your balcony to a few pots, you’re joining a vibrant community of Canadian gardeners who understand that growing herbs is about more than just having fresh basil for dinner. It’s about connection, sustainability, and the joy of nurturing life.
We’d love to hear how your herb gardening journey unfolds. Share your first harvest, your challenges, and your victories with the Gardening Life Community Project. Together, we’re cultivating not just herbs, but a community rooted in learning, sharing, and growing.


